Showing posts with label recipes. Show all posts

Wednesday, July 4, 2018

Happy Fourth of July with Two Summer Salads

It's that time of summer when we find ourselves outside with friends and family celebrating being together. I'm sharing two recipes for pasta salads that are sure to please the crowd. I love that I can make them in the morning, let them sit in the fridge to blend the flavors, and then grab and go to whatever potluck event is waiting. These salads are two of my favorites.

Broccoli Pasta Salad

8 oz of pasta spirals, cooked al dente, rinsed with cold water to cool quickly, and drained
a handful or two of broccoli florets, blanched for 3 min, rinsed with cold water to cool, and drained
1/2 red onion, diced
1/2 cup of dried cranberries
6 strips of cooked bacon, cut in pieces ( I put it in the oven at 400 degrees for 20 min)
1/2 cup Parmesan cheese, or grated Italian blend
1/4 cup mozzarella cheese

Dressing:
1 cup Mayonnaise
2 Tablespoons apple cider vinegar
2 Tablespoons sugar
salt/pepper to taste

Combine the salad ingredients in a large serving bowl. Prepare the dressing by combining ingredients in separate bowl, then mix lightly into the salad to coat. Let sit in the refrigerator for at least an hour to blend flavors and cool. Serve.


Creamy Avocado Fiesta Salad

I got the idea for this salad from Natasha's Kitchen website, where I found Creamy Avocado Salad, The dressing really intrigued me, because it was made with avocados and spinach, and I have lots of spinach coming out of my garden right now. Because Natasha's recipe calls for corn and avocado, I decided to combine this recipe with another family favorite -- corn salsa salad, which they love to eat with tortilla chips or as a side dish to anything BBQ'd. I ended up cutting Natasha's dressing in half, and I still had about a 1/2 cup left over to use as a dip for crackers and chips. I also used black beans instead of peas, and canned tomatoes instead of fresh grape tomatoes (it's what I had on hand), and added a bit of lime juice to the dressing, instead of straight lemon. So you have wiggle room to have fun with this one, and it will still taste great! (And for this recipe, you will need 3 avocados to prepare both the salad portion and the dressing).

6 oz of pasta rigatoni, cooked al dente, rinsed with cold water to cool quickly, and drained
1 can black beans rinsed
6 oz frozen corn, blanched and rinsed with cold water to cool, and drained
1 can diced tomatoes, drained and rinsed
1/4 tsp or more, ground black pepper to taste
1/4 tsp salt, to taste
1 1/2 avocado, cubed/chopped

Dressing: Combine the following ingredients in a food processor and mix to combine until smooth
2 cups fresh spinach leaves, not packed
1 1/2 fresh avocado, pit and skin removed - you probably know this
3 Tablespoons lemon juice
1 Tablespoon lime juice
1 fresh garlic clove, pressed or diced

Combine the salad ingredients in a large serving bowl. Prepare the dressing separately in a food processor, then mix lightly into the salad to coat. Let sit in the refrigerator for at least an hour to blend flavors and cool. Serve.

Wednesday, June 6, 2018

Grandma's rhubarb custard pie and hints on how to freeze rhubarb

Rhubarb season is in full swing here, although I have to admit that my garden produces more than I can keep up with. Every year I am burdoned with the guilt of letting much go to waste, although I do manage to freeze a quart or two to enjoy later in the season after the harvest is done, and I also give some away to neighbors who are willing to take it.

There are numerous recipes for enjoying this tart plant. My neighbor makes a slushie, another neigbor makes crumbcake bars, a friend makes rhubarb-strawberry pie, and I have always made rhubarb custard pie. If you aren't a fan of pie dough, then just forgo the pie shell and make a custard pudding with the filling. The pudding has worked for me when I've ended up with more filling than can fit in the pie.

If you're uncertain as to whether you would enjoy this pie, then I offer this simple advice-- If you love meringue, than you'll love this custard pie. It's creamy-sweet like that.

Perhaps the most time consuming part of the recipe preparation involves the peeling of the rhubarb stem skins. I always trim the stem above the root and a couple inches below the leaf. Then I use a paring knife to pull away the stem skin. The skin will come off in strips. Then you will want to slice the rhubarb into small pieces until you have 3 1/2 to 4 cups of chopped rhubarb.

After that, the recipe is straightforward. Look below for what you'l need.

Grandma's rhubarb custard pie

3 large eggs
3 Tablespoons milk
2 cups sugar
1/4 cup flour
3/4 tsp nutmeg
2 teaspoons cornstarch
1 Tablespoon butter, melted
3 1/2 - 4 cups peeled and chopped rhubarb (as described above)
rolled pie dough for 1 single-crust 9-inch pie

Place pie dough in pie pan and decorate edges as desired. Preheat oven to 375 degrees.
In a bowl, beat the eggs, milk, sugar, flour, nutmeg and cornstarch together until smooth. Add melted butter and mix again. Stir in rhubarb, then pour the filling into the pie shell.
Bake at 375 degrees for 40 minutes, then turn heat up to 400 degrees and bake for another 10 minutes.  Remove from oven, lightly brush top of pie with another 1 tablespoon melted butter and allow to cool. Store in refrigerator to chill. Then serve. This recipe makes about 8 servings.

Freezing rhubarb.

After peeling and chopping the rhubarb, blanche it for 2 minutes in boiling water. Then drain and immediately cool the rhubarb down by running it under cold water. Spread the rhubarb out on linen towels to dry. Lightly grease an aluminum cookie pan with oil. After the rhubarb is cool and mostly dry, then spread the chopped rhubarb out on the aluminum pan and set in the freezer.

This step allows the chopped rhubarb peices to freeze individually in their own space, rather than getting clumped up and stuck together if you were to put them directly into a bag. Once the chopped rhubarb is frozen on the aluminum pan, transfer the rhubarb to a labeled plastic bag.

I've added an image of some blackberries that I froze with this same method last year. Although I do NOT blanche the berries. I just rinse and dry them on a towel before freezing. Since these berries are the last of my frozen berries from 2017, I am anticipaing a fantastic new harvest for 2018!


If you have other suggestions, let us know in the comments! Happy summer!


Tuesday, June 16, 2015

Got Eggs? The egg shortage of 2015

I recently read about the millions of chicken deaths in the Midwestern chicken farms due to some sort of bird flu, which has resulted in a shortage of eggs in the US and sky-rocketing egg prices. So, today I thought I'd share a recipe for an egg-free Black Forest Cake that I used to rely on many years ago when I was suffering from numerous food allergies that had descended upon me all at once after getting a weird immunization booster for being out of the country within the 10 years prior.  (I became allergic to all the foods in my system: milk, wheat, chicken, coffee, bananas, etc. But that's another story.)

Believe it or not, this cake was often requested at many social gatherings I went to, not only for the health-aspects of it (lower calorie), but for its great taste.  Perhaps the ingredient list will nudge you toward being creative with modifications to your own favorite recipes, if the need arises.

Black Forest Cake (from the Food Allergy News Cookbook)

2 cups sugar
3/4 cup milk-free, soy-free margarine (I use regular margarine now. And sometimes I substitute 1/4 margarine for 1/4 cup applesauce.)
1 1/2 cups boiling water
2 1/4 cups flour
1/2 cup cocoa
2 tsp. baking soda
2 Tablespoons oil, 3 Tablespoons water, 2 tsp baking powder, beaten together
1 1/8 tsp vanilla extract

canned cherries (I skipped this part, and just frosted the cake up with vanilla frosting)

I also need to add another optional ingredient, which helps offset the absence of eggs:  a small pinch of xanthan gum. This helps the cake to rise and stay risen after baking. Don't use too much or your cake will be stiff.  A tiny bit does go a long way. However, xanthan gum is expensive. Yet, it will last forever, and you can find that you can use it in many different recipes that need help in maintenance of consistency, like custards, or cheesecake, or whatever. That is an upside to the cost, provided you do a lot of cooking and dare to be adventurous in the kitchen. Xanthan gum also helps if you are gluten/wheat intolerant and need to bake with alternative flours, such as rice or tapioca or others. I found it especially helpful in those types of recipes I when had to develop them, because I couldn't eat anything else.

Back to the directions: 
Preheat oven to 350 degrees. Grease and flour 2 round cake pans (I used a 13x9, instead). Cream together the sugar and margarine. Add the water and beat together. Sift dry ingredients together and add to the mixture. Add oil, water, and baking powder mixture. Add vanilla and beat well. Pour the batter into pans. Bake 30 minutes.

When cooled, spread canned cherries on top of one layer, put the other layer on top and frost with chocolate frosting.

Again, I used a 13 x 9 pan to make a single layer chocolate cake that I topped with vanilla frosting. Explore and enjoy your own!

Wednesday, December 10, 2014

A New Way to Pesto

The diminishing quality of pine nuts on the market over the last couple of years has brought disappointment to many-a-pesto-lover in the kitchen, given the high cost of these special nuts.

Many reviews and comments about pine nuts referenced a lingering bitter taste in the mouth that became known as "pine mouth," which was especially troublesome since it was impossible to know by look or smell if the nut you had on hand was good or bad. Even the FDA got involved, read here.

Making pesto can be costly enough, if you have to purchase all the ingredients from the store -- olive oil, fresh basil, Parmesan cheese, and nuts. Thus, I for one, wasn't thrilled about dropping cash on nuts that may ruin a whole batch, let alone leave me clawing at my tongue for weeks to get rid of that awful taste.

Thus, I searched for an alternative, and low and behold, I found one. Garbanzo beans.

However, if you want to avoid making glorified humus, preparation of the pesto requires a couple tricks.

First, you have to bake the beans in the oven at 225 degrees for about 40 minutes. Second, you MUST be sure to add lemon juice. This ingredient is essential, and I will warn you that many recipes floating out there on the web for this garbanzo bean alternative to pesto have omitted it. Unfortunately, those who don't know any better will be highly disappointed, and likely voicing my own son's remarks after tasting the first trial batch, which were, "That's not good." (Note: remarks have been modified to protect reputations of all parties involved.)

Fortunately, I didn't throw out the batch, and after a fair amount of reflection over what I'd done, I realized what was missing, and the pesto was easily saved. (Note: it always helps to refer back to your own original recipes.)

Pesto can be prepared for a variety of uses. I tend to use mine for cracker and sandwich spreads, so it has a thicker consistency than what may be drizzled over pasta.  Whatever your fancy, you can modify the recipe to suit your needs. Pesto is highly forgiving that way. Want a pasta dressing? Then add more oil, and back off a bit on the beans.

Enjoy your own experiments, and have fun welcoming pesto back into your kitchen (with a better budget, too!)

Pesto with Garbanzo Beans

1 can garbanzos
2 cups fresh basil, packed
1 cup Parmesan cheese
4 cloves garlic
1/4 tsp black pepper
1 tsp salt
1 cup olive oil
1/4 cup lemon juice

(optional: add 2 medium, seeded, roma tomatoes)

Mix all together in a food processor.

Serve what you need, and Freeze the rest in smaller tuperwares for up to 6 months.

I've posted a lot about pesto before. For the original tomato pesto recipe, go here.

Sunday, April 27, 2014

Better Days with a Recipe for Better Strawberry Pie

After feeling like I've been falling into a deep freeze the past few days, it looks like Spring is finally emerging victorious over Old Man Winter who wanted to rear back up its ugly head. I see a peak of blue sky on the horizon, which I am hoping will yield to a bit of sunshine later this afternoon.

This calls for a celebration. Not only because I'll finally warm up, but also because my face surgery went better than expected a couple weeks ago. The carcinoma was not as widespread as the doctors had prepared me for, and the scar is already hardly noticeable since it fits right along the edge of my nose. Plus, my stylish hat collection is growing, so I feel like a woman born-again -- at least when it comes to sizing up my status in fashion.

My renewed sense of energy has lured me back into the kitchen. With strawberries coming back in season in my neck of the woods, I'm going to share one of my son's all-time favorites: Strawberry Pie.

But today you not only get a better recipe than you'll find on the web, you get two. Plus, both are healthier and just as tasty. I don't think it can get any better than that, can it?

Well, I suppose it always can, but we're sticking to the pie.

First, with the healthier side. Many of you probably have heard the reports coming out about how bad sugar is for our bodies. Among its many dark deeds, it is directly linked to Type 2 diabetes. For years, I've always cut back on sugar in my pies, simply because with the natural sugars present in fruit, I decided that most recipes call for an overkill. Let me assure you that cutting back on sugar is not for lack of a sweet-tooth on my part. I LOVE sweets, and will never turn down cake or cookies for breakfast if such items are lingering in my kitchen from the day before.

However, after much thought on the matter and baking in the kitchen, I realized that most recipes were designed historically around a time-intensive transportation/delivery system that no longer is in place today. Historically, in the 70s, 80s, and 90s, fruits and vegetables that found their way into the kitchen weren't recently harvested, but had endured a week- to month's worth-or-more-of-time in transportation and storage. During that time, sugars would naturally break down, and thus fruits weren't as sweet as what they would be if they were fresh-picked and ripe at harvest.


These days, with improved refrigeration during delivery and shorter time from harvest to table, I've bet on the side that most recipes continue to call for more sugar than you typically need. Especially if you're using fresh regional produce. Even more so, if you're using your own.

I've found this too-much-sugar concept to be particularly true when making jam, and you can read more about that in my post here. Nevertheless, if using less sugar applies to jam, it's going to apply to pies as well, as I've been practicing all along. So here goes. Let's dive right in!

Better Strawberry Pie, Recipe #1

1 9-inch pie crust, lined in pie pan, pricked with fork and baked 10 min at 400 degrees
1 quart organic* strawberries, plus extra for fresh garnish
1/2 cup sugar
3 tablespoons cornstarch
3/4 cup orange juice
whipped cream for topping

Hull and slice the strawberries and place them into a heavy-bottomed, medium sauce pan. Don't mash them. You'll lose what makes eating fruit good for you. (Do research if you want to know more.) Pour the sugar over the berries and then add the orange juice. Let the berries sit in this concoction for about 30 minutes. The juice and sugar will begin to draw out those natural sugars and water inside the berries. While you're waiting, pass the time by preparing the pie crust.

You can also pass the time by hulling and slicing those extra berries you bought and set aside. You'll be tossing these on top of the pie when serving it, so you might as well get them ready.

*Speaking of berries, use organic if you can. Strawberries are in the Dirty Dozen for pesticide residue, because they are grown with tons of pesticides. So go organic, if you can. Especially if you're cooking for kids.

After about 30 minutes, add the cornstarch to the berries and cook them over medium heat, while continually stirring them. The juice should thicken up as it starts to slowly bubble after about 5 minutes. I usually let it continue to slowly bubble for about 1 minute more with stirring. Once it is reasonably thick, remove the pan from the heat and allow the sauce to cool for about 15 minutes. Then pour the cooked berries and sauce into the prepared pie crust. Set the pie in the fridge after it has cooled for 10 minutes more. The pie should be ready to serve after about 2 hours when it has completely chilled and set.

Top each slice with fresh berries and whipped cream.

Better Strawberry Pie, Recipe #2

So, I happen to love cheesecake, so that is where this recipe comes from. Combining two of my favorite pies. My son prefers the first recipe. Me? I'll go for either one, but if push comes to shove, I'll grab the second.

1 8-inch graham cracker crust, prepared

1/2 of the strawberry pie recipe above (for filling) (prepared separately)
1 package Pillsbury cream cheese (8 oz), softened to room temperature
1/4 cup sugar
1 Tablespoon flour
1 egg
1/2 cup sour cream (4 oz)
2 teaspoons orange juice or 1/2 teaspoon vanilla

Mix all the ingredients for the cheesecake portion of the pie together until smooth. Pour into the graham cracker crust and bake at 325 degrees for about 30 minutes (until firm). Remove from oven and let cool.

While the cheesecake layer is baking, make your strawberry filling for the top layer of the pie, as directed in recipe #1. When the strawberry filling is cooled to a warm temperature, pour it over the top of the cheesecake layer, and set in the fridge to chill and set. The pie should be ready to serve after about 2 hours. Top each slice with fresh berries and whipped cream.

Enjoy!

Feel free to share any of your favorite ideas and tips.

Sunday, February 2, 2014

Better Pasta Salad and Music for Sunday (pre-SuperBowl Sunday)

It's Superbowl Sunday! Are you ready for all the activity? I've found some beautiful Native American Flute Music for you to enjoy this morning as you get ready for the day ahead.

Before the game I am hoping to get some snowshoeing activity in with my daughter. But first I'm sure I'll be busy prepping some sort of food for the festivities and the week ahead. One of those is a Pasta Salad. This is a great dish to share with a group of people you are hoping to impress. Better yet, you can bring any leftovers with you to work for a simple lunch. As a teacher, I am always looking for simple but satisfying (and no, a Snickers bar just doesn't cut it despite what the commercials say).

So, if you're looking for a great and easy meal, scroll down to the recipe below. It takes about 30 minutes to make from start to finish. It can be served fresh-made with hint of warm still lingering, or chilled after being set in the fridge.

 Enjoy!


Better Pasta Salad

Ingredients:
8 ounces of BowTie pasta (1/2 of a 16 ounce bag)
6-8 ounces of broccoli (frozen or fresh)
1/4 of a red onion, chopped
1/2 cup cranberry raisins (crasins)
1/2 cup slivered almonds
6 strips of cooked bacon (chopped) OR 1/4 lb deli ham (sliced for sandwiched and then chopped by you)
1/4 cup grated Parmesan cheese
1/4 cup grated mozzarella cheese

Dressing:
1 cup mayonnaise
2 Tablespoons apple cider vinegar
2 Tablespoons sugar (I use pure raw sugar seen in the photo here, but granulated works just as well)

salt/pepper, sprinkled to taste

Instructions:
Cook the pasta until just tender, drain and set in your salad bowl.
Cook the broccoli until just tender as well (don't let it get mushy or too soft). Drain the broccoli and add to the pasta in the bowl.


If you are using bacon, cook that as desired, then cool and chop.
Or, if you are like me and prefer a less fatty, ready made meat, go for the deli ham and chop that up instead. Add the meat to the pasta bowl.
Add the remaining ingredients (onion, almonds, cheeses) add stir together.


In a separate bowl, mix the mayonnaise, vinegar and sugar with spoon until smooth. Pour this over the ingredients in the pasta bowl and mix to distribute throughout the salad.

Top with a bit of fresh ground black pepper and salt to taste.

Chill or serve as is.

Serves about 8 generous portions.


Friday, December 27, 2013

Return to Holiday Fruitcake

Fruitcake
photo from simpleplate.com
A day for FRUITCAKE!

Yes, believe it or not, December 27 is a day that has been set aside to celebrate this oft-loved or hated (depending on your experience) dessert.

Hated?

Apparently.

At least that is what seems to be the case for some misfortunates in my little part of the world in Northern Utah, where dodging fruitcake has become a holiday pastime. I'll admit I've enjoyed the stories of neighbors and friends who laugh over the gifted loaves brought to their doors, chuckling at the idea of how many times their gift has changed hands amongst their neighbors and wondering if they dare re-gift it, lest it end up in the hands of the very first neighbor that actually baked that particular loaf.

For this reason, fruitcake has become something of an endearing and curious mystery to me. I mean, how could a dessert, that is so varied and so long-lived in the history of cooking, have gotten such a bad rap?

Based on my limited (or lacking) research, I'll simply blame it on commercial-mass production. Makers like Hostess and Edemmann's simply didn't get the recipe done right when they boxed up their hastily made loaves, which ultimately ended up in the public-shunning-of-fruitcake to become engrained in society.

Such a shame.

http://www.amazon.com/From-Rivets-Rails-Railroad-Boarding/dp/0615730426/ref=sr_1_1_bnp_1_pap?ie=UTF8&qid=1388166897&sr=8-1&keywords=rivets+and+rails+cookbookI grew up in a family where women in both my paternal and maternal lineage loved to bake. And thanks to a grandmother who would send the traditional Kennedy family fruitcake at the holidays, I grew up liking and eating fruitcake. The particular Kennedy to which this savory recipe is attributed is my great-grandmother on my father's side, who cooked for numerous railroad workers and travelers in her boarding house, and spent a great deal of time perfecting her fruitcake recipe. Her hand-written cookery journal held at least five different versions.

And she wasn't alone in her yearly undertaking to bake a good holiday fruitcake. Of the hundreds of cookbooks I've read over the years, I've seen as many different recipes.

Surely, a sweet bread that has been baked through multiple centuries is worth delving into at every opportunity. And with the price of nuts and dried fruit these days, each loaf could literally be worth its weight in gold -- just like this recipe I'm sharing below.

Happy National Fruitcake Day! What do you think? Do you love it or leave it?

Here's a link to some fun fruitcake facts from Foodimentary

Ribbon Fruitcake

Dark Part:
yolks of 6 eggs
1 1/2 cups sugar
1 cup butter
2 cups browned flour
1 1/2 lb raisins
1/2 lb citron
1/4 lb nuts
2/3 cup whiskey
1 tsp baking soda, dissolved in hot water
1/2 tsp cloves
1/2 tsp nutmeg
1/2 tsp cinnamon
1/2 tsp allspice

Light Part:
whites of 6 eggs
1 cup white sugar
1/2 cup butter
1/2 cup sweet cream
2 1/2 cups flour
2 tsp baking powder
1/2 lb citron
1 lb chopped almonds
1/2 cup grated coconut
1 tsp rose water
1 tsp lemon extract
1 small slice of sugared orange peel


Sunday, August 18, 2013

Better Tomato Pesto and Its Secret Ingredient

If you love traditional basil pesto, then you will have to take my daughter's word for it that tomato basil pesto is better.

I suppose I can say she is a reliable source since over the years I have put many varieties in front of her at the kitchen table. Those flavors have included sunflower basil pesto, yellow bell pepper pesto, spinach pesto, white kidney bean pesto, and sage pesto. Tomato pesto is her favorite.

Since tomatoes are ripening on the vine, there is no better time than the present to share this recipe.

As for the secret ingredient, it's grape-seed oil! I love it's light and smooth flavor, which yields a consistent quality. Although olive oil is traditionally used in pesto, I tend to get boggled down and somewhat disappointed in experimenting with all the different shades/designs of olive oil that are available. Usually in choosing between virgin, extra virgin, light or regular, I've found that despite whatever the label says, some olive oil varieties/brands can be heavier in flavor than what I thought I was getting -- or provide no flavor at all. However, Grape-seed oil has solved that! Plus, Grape-seed oil is another one of those oils that is good for you with its high content of Vitamin E and anti-oxidants.

Enjoy! And happy living to you!

Tomato Basil Pesto

1 1/2 cup fresh basil
4 medium tomatoes, skins blanched (removed), seeds and cores removed
1 Tablespoon lemon juice
3 cloves fresh garlic
1/4 cup grape-seed oil
1 cup grated parmesan cheese
1 cup pine nuts
salt and freshly ground pepper to taste

Combine all ingredients in food processor and blend until somewhat smooth. Modify to taste.

Serve with crackers, or as a spread on your next sandwich, or mix into pasta. Creativity is yours!

Wednesday, July 17, 2013

Better Zucchini Bread


Okay, so if you are anything like me and have a garden, now is about the time when you have zucchini coming out of your ears.

And if you are even a tinier bit like me, you are probably asking yourself why you went ahead put another plant in your garden this past spring.

And if you are perhaps even less like me, but still one to ask further questions, you are also probably asking yourself if it would be possible to put in just 1/2 of a plant next year, because ONE plant is so MUCH MORE than enough.

In the grand scheme of things, what does this foolish questioning all add up to? One thousand and one ways to cook zucchini. Because eleven, or even thirteen ways, were never enough. It's quite possible that one thousand and one ways were necessary to keep family units from tearing each other apart over having to eat zucchini night after night. 1001 recipes might be what has kept neighbors from beating each other over the heads with it when another green-spotted club somehow got placed in the mailbox, or on the front step, or left in the middle of the lawn. 1001 recipes have probably kept children from sculpting shriveled heads from it, or tossing it in the streets, or trying to feed it to the dog. Yes, even the family dog needed that one thousand and first recipe, just to keep that vegetable from ending up in its dish.

Which begs the next question. Why I am bothering to share another recipe? Upping the recipe clutter to one thousand and two? The reason is this: I'd simply like to prove that even the internet--wired and virtual as it is--can't escape prolific production of this plant. You'll find recipes for zucchini galore on the NET and here I am offering one more.

But before you make haste with a shrug of your shoulder and go, let me assure you that this recipe for zucchini bread is very good, and probably a little bit better than yours. Why can I say this? Because this recipe isn't mine. It happens to come from the wife of a co-worker, who pawned (I mean, brought) one of her loaves to a faculty meeting one day. Knowing she was a fabulous cook, I didn't hesitate to give the old zuc bread a try. Surprisingly, it was better than I'd ever had. (Sorry Mom!)

Enjoy!

Better Zucchini Bread

3 eggs
1 cup oil
2 cups sugar

3 cups flour
3 tsp cinnamon
1 tsp baking soda
1 tsp baking powder
1 tsp salt

2 cups grated zucchini
1/2 cup sour cream
2 tsp vanilla
1 cup choc chips

pinch-fuls of sugar, sprinkled on top of loaf batter before baking.

Mix ingredients in order shown. Grease & flour 2 loaf pans. Bake at 325 degrees for 50 to 70 minutes, depending on the temperament of your oven. :)

Sunday, June 23, 2013

Better Garden Salad

A recipe for salad? You betcha. Along with a highly encouraged nudge to visit your local farmer's market to browse, nibble, sample, and pick up some of these wonderful tidbits to go into your guaranteed, bonafide delectable, splashy, full-of-color garden green salad! What do I have in this one?

red romaine (a new variety I can't remember the name of)
arugula
baby spinach
baby Swiss chard
red leaf lettuce
baby green leaf lettuce
baby beet greens (this is what you "weed out" when thinning your beets that may be growing in the garden, but they are extremely tasty and in demand, so savvy farmers now offer them for sale)
snipped baby beets (Why waste the root that you would otherwise eat when it's bigger?)
snipped chives
fresh parsley
fresh mint
dried cranberries
crumbled feta cheese
fresh black ground pepper
balsamic vinegar and olive oil dressing

Of course, you can add whatever is available and in season from your own local market, like shaved fennel root or snipped fennel tops. But I encourage you to try something new. Fennel was a new thing for me that I tried a couple weeks ago, but my source was out of it by the time I got to the market this past weekend.

How did I come to be inspired to create, let alone write about what some may otherwise overlook as a common table food? Because I am lucky enough to be a year-round teacher for some special students. In the summer I teach an environmental science class, and during our unit on agricultural resources I always schedule in a field trip to some local farms. Bill Masslich and his wife Penny own a small organic farm named First Frost Farm. I've known Bill for more than 20 years. He was one of the first people I met when I moved to Cache Valley, and I can whole-heartedly say that he is one of the best guys I have ever known. His sincerity and honesty and goodness just emanate from within. My students always pick up on this, and always become immediately enamored with him as soon as they meet him. Without a doubt our annual field trip to his farm is always a favorite. And even though I've known Bill for many years, and have talked to him many times about gardening and growing vegetables, I always learn something new.

The most important thing that my students and I take away from our annual visit is that local farms are important. They are vital to communities. They are vital to local economies. They are vital to our health and survival. Good agricultural land is disappearing too quickly. Healthy produce (that won't make you sick, as in recent headlines) is vital to local consumers. People want to know where their food comes from, who grows it, who takes care of the land. Farmers like Bill and Penny at First Frost Farm are doing just that, and we should do our best to support them. So visit your local market and scoop up what's in season. Ask about what you can do to grow your own produce. You don't need a whole lot of space, and local farmers are always more than happy to offer ideas on how to do it, and well as ideas on how to cook whatever they are offering.

For example, this past weekend, Penny talked me into trying fresh mustard greens. She chuckled when I asked her what to do with them. But per her suggestions, I brought them home and sautéed them with butter and fresh scapes of garlic (another new hot item which you can also get right now at your local farmers market). It was quick, easy, and delish!

Just like me, you'll walk away inspired to eat better, and feel great about supporting your local community and the people who are working to preserve the heart of it.

Thursday, June 20, 2013

My Life as a Lumberjack and its Recipe for Omelets in a Bag!


One of the things I love about summer is being able to find quiet times where I can sit in the shade while the sun beams down around me and read a book, especially if it is a cute book--one that makes me laugh, one that takes me elsewhere, and one that I immediately want to share with the other readers in my life, like my daughter and my YA book-loving friends. My Life as a Lumberjack (or How I Fell for the Wrong Guys) meets all of these expectations. It's a fun-tastic read that took me to the heart of an adventure set in the mountains of Northern Utah. Plus, I've got a recipe to go with it! "Omelets in a Bag" is hot off the press (or the pen), from the Lumberjack author herself, Sara V. Olds.
Whether or not you're up for making an omelet lumberjack-style, I'm highly recommending that you add this fun book to the TOP of your "Must Read Summer List!"
 
And there's another plus! Since this book is currently on tour, we've got a contest that you can enter to win cool prizes, like a copy of My Life as a Lumberjack! Click here to enter a Rafflecopter giveaway

 So buckle your seatbelt! Wrap yourself up in that apron you know you've got tucked in a kitchen drawer, or go out and kindle that fire. Here we go!

Omelets in a Bag
 
Ingredients:
Eggs
Onions
Tomatoes
Pre-cooked bacon or ham
Mushrooms
Shredded Cheese
Salt and pepper
 
Supplies:
Quart-sized freezer zip bags
water
multi-quart pot
tongs
knife
cutting board
Dawn Dish Detergent
 
  Before using the cooking pot, smear a thin layer of Dawn on the outside of the pot—it will make it easier to clean up and keep it from staining in the fire. Fill the pot about one-half to three-quarters full of water. Set on heat source (fire or propane burner) to boil. Chop fresh ingredients while water is coming to a boil. (If this is for your first breakfast in camp, your ingredients could already be prepared if you thought ahead to pack them in so they're ready to use).
  With a partner, break eggs at least two—into one of the freezer bags, then add all other ingredients as desired and squish up eggs in the bag to mix. Squeeze as much air out of the plastic bag as possible (**VERY important!).  Zip and drop flattened bag into boiling water. It WILL expand! Boil for 2 to 3 minutes and fish the bag (or bags) out, using your tongs. Carefully empty your eggs onto a plate and eat! Use the boiling water that remains for hot chocolate or tea. Use the hot leftover water for cleaning any dishes.
 
(Isn't that so smart?!)
 
Who is brave enough to try?
 

Author Sara V. Olds

Visit Sara's website here
 
Find Sara on Facebook here

Friday, June 7, 2013

Better Rhubarb Pie?

We're about at the end of rhubarb season here in Utah, but just in case you happen to be lucky enough to snag a handful of tart stems and are wondering what you might do with them, I'm going to tempt you into trying what I'm calling a "Better Rhubarb Pie."

Why? Because this recipe comes from grandma, of course, and who else would have a recipe that I could say is BETTER than anything that is already out in this big yonder world?

Yes, I know we all have grandmas.

And we all have favorite recipes from grandmas.

So if you happen to already possess a favorite, better recipe for rhubarb pie from your own grandma, then I'll simply say this: Here Is Another Rhubarb Pie Recipe Worthy of Trying.


Doesn't it look pretty?

And different?

That's because this recipe happens to have a sweet custard base for the filling. Kind of like pudding. Remember Georgie Porgie Pudding and Pie? Ring a bell? No?

Sorry, I digress. Let me just say that these two great tastes go great together. Rest assured, I get yearly requests for this pie from people that are not members of my own family. Some have even crossed state lines for it (at least when I put gooseberries in it, which taste just like rhubarb when they're baked). So, it's good. At least, I have always liked to think so. Enjoy!

Better Rhubarb Pie

3 cups chopped rhubarb
3 eggs, beaten
1 1/2 cups sugar
1/4 cup flour
1/2 teaspoon nutmeg
2 Tablespoons milk
1 Tablespoon cornstarch

Line a 9 inch pie pan with pastry, then set in fridge to keep cool while prepping batter.

Mix eggs, sugar, flour, nutmeg, milk, and cornstarch together in a large bowl. Stir in rhubarb.

Pour batter into the pie shell. Bake for 50 minutes to 1 hour at 400 degrees. Remove from oven and dot with butter. Cool. Chill. Serve.


Saturday, May 25, 2013

Better Chocolate Chip Cookies

May 15 was chocolate chip cookie day!

Since we make chocolate chip cookies regularly, it was easy to catch this day without even trying. The tricky part for us though, turned out to be dealing with the stock in the cupboards. Having all the ingredients can be a problem in a kitchen when you have a head cook who doesn't make it habit to always shop with lists (i.e., me). Which is how we happened to stumble into a better way to make chocolate chip cookies.

Our problem was finding a substitute for brown sugar. And what we came up with was a tasty end result. I highly recommend what I'm calling a Better Chocolate Chip Cookie recipe, especially if you've been wondering what the new trend toward using raw sugar is all about!

Here goes:

1 cup of your favorite butter or margarine (I use 1 stick each)
3/4 cup of granulated white sugar
3/4 cup (nearly) of raw sugar, topped off with white sugar, which will fall down in between all the spaces around the raw sugar
3 teaspoons molasses
1 1/2 teaspoons vanilla
2 large eggs
2 1/2 cups flour
1 teaspoon baking soda
1/2 teaspoon salt
1/2 bag semi-sweet chocolate chips
1/2 bag real milk chocolate chips
3/4 cup chopped walnuts (not too fine, unless you really like that nutty flavor in your cookies)

This is the order I usually work with in combining my ingredients: creaming the butter and sugars, followed with adding the wet ingredients, and then mixing in the dry. I've used molasses and granulated sugar as a substitute for brown sugar before, so I had some inkling of an idea of what I was doing. The raw sugar is a new thing I've been using in the house, particularly in making my morning cup of coffee. But using it in the cookies gave a pleasant texture and taste that combined really well with a reasonably soft cookie. We baked these on a cooking stone at 375 for about 11 minutes, then dropped it to 10 minutes for later batches after the stone warmed up. Also, we usually use only 2 1/4 cups of flour for the traditional recipe, but for some reason, in this go-round it didn't give enough heft to the batter, so we had to add more. Was it the molasses? Or unusually large eggs? Who knows. Use your best judgment in getting to the final consistency of a batter you prefer.

If you decide to give these suggestions a try, let me know how it goes!

I endorse the idea that chocolate chip cookie day can be celebrated any day!

Happy cooking!
 

Friday, April 5, 2013

Fixing Up Fridays with Indie Music, an Indie Book, and Darn Good Food

My daughter brought an acoustic version of Neyo's "Let Me Love You" to my attention today, which we found covered by a lot of different artists on YouTube. Here is one my favorites that combines two songs together: "Let Me Love You" by Neyo and "Diamonds" by Rihanna. Can't go wrong with this one! It's sung by Indie Artist Maria Zouroudis.


As for the week's latest book suggestion, I'm not much of a romance reader, but I have been lured into buying a few titles lately for my Kindle. Here is one that I am about to dive into: Sand Dollar by Indie Author Sebastian Cole.  Basically, boy meets his soul-mate girl, but circumstances keep them apart. The boy is introduced to us on his death bed, yet, we don't know if his life ever brought him back to that soul mate girl, whom he could never stop thinking about. Could be an interesting read! It's earned an average of 4.5 out of 5 stars on Amazon.


Now for the food.

I can't promise that it is anything very good for you, other than the wee bits of vitamin C provided in the form of lemon zest. But if you like sponge cake with a bit more heft, this may be the treat for you:
 
Railroad Cakes.


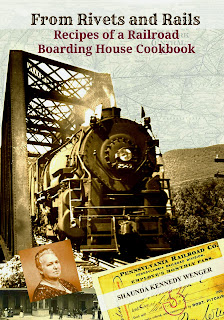
This recipe is taken from my latest cookbook: From Rivets and Rails, Recipes of a Railroad Boarding House Cookbook, which is based on the cookery journal written by my great grandmother, Elizabeth Shade Kennedy. She ran a boarding house for railroad workers on the NY and Pennsylvania Railroad line. If you'd like to learn more about the connections between American cooking from the early 1900s and the expansion of the American railroads, I highly recommend you grab a copy of my cookbook! Chef John Malik at the Huffington Post book reviews says, "It’s a delightful slice of Americana and a glimpse into the life of a hard working cook at a time in our country’s history when self-sufficiency was a matter of life and death."

Railroad Cakes

1 cup white sugar
1 cup flour (or more to make batter thick like cookie dough)
3 eggs
butter, the size of an egg
1 tsp cream of tartar
1/2 tsp baking soda
zest of 1 lemon
a little milk (as in a smidgen, or drop, (not much!) )

Mix these up and bake at 350 degrees until done. Since these cakes were meant to be individual cakes that were commonly purchased from vendors at the railway stations, I baked them in small tart pans. This recipe gave six 4-inch cakes. Delish!

Friday, March 1, 2013

Fixing Up Fridays

Hello again! It seems like I haven't been here a while. Since it's Friday and I feel like I finally might be coming up for air after a whirlwind tour in stupidity and the details of life, I thought I'd share a video that is akin to how I'm feeling. Plus, it's worth a good laugh.


As for the rest of this post, a few Friday's ago I thought I'd close the week on Friday with a recommendation of a book, a recipe, and a drink. The book is easy. Right now I'm in the middle of The False Prince by Jennifer Nielsen. It's a quick read and entertainning for young readers or the young at heart like me. My son read this book recently and liked it, so I thought I'd give it a go. So far, so good. Although I must say, I am starting to develop a pet peeve for books for young readers that have violence in them (one of the kids in this book is murdered within the first few chapters.) I don't get it. Is this really what our literature for young readers has come to? Are we as a society unable to identify with any else? Nevertheless, the story is good. Thus, the dilemma to my thoughts.


Moving on to food. Tonight I shall be travelling to see our local high school basketball team (Mountain Crest) battle it out with another local high school basketball team (Logan High) for some sort of semi-final match. What does one eat when one must travel during dinner time for such occasions? I don't know. Probably nothing, which is why there will be no recipe with this post. On second thought, if you're in rush like me, there is this thing called Bruschetta, which involves topping sliced bread with tomato, garlic, basil and mozzarella, and sticking it in the oven at 400 degrees for 8 minutes. How's that for a recipe that you can literally run with? Here's a pic where I actually had time to make it look pretty. And yes, it is almost waving at you like a flag, because I didn't have time to flip the pic.


The drink? The other day I enjoyed mixing Pomegrante Juice and Lemonade. And no, Chef John, it wasn't fresh-squeezed. :)  (He likes the good stuff, and has reprimanded me on this topic in the past.)  The drink is Quite yummy with a splash of, well.... let's keep it Rated G and call it 7-UP.

Any one seeing Jack the Giant Slayer this weekend?


Tuesday, November 6, 2012

The Need for a Title on the Railroad Cookbook

 We are in the midst of getting the railroad cookbook ready for publication, and that includes the design of a cover and yes, a title.

You would think that we would have settled on one by now, but that is not the case. We've been more concerned with the content and historical trivia that is contained within the handwritten recipes of the journal. But the time has come to start turning our attention to this detail.

So we are asking for opinons!

Here is what we have so far. Let us know what you think and send us new suggestions if you have some.

1. The Roundhouse Cookbook. Recipes of a Railroad Housewife
(problem: no roundhouse in Avis, only the "shops" where the NYC line trains were rolled in and out for repairs)


2. From Rivets and Rails, Recipes of a Railroad Housewife


3. Working on the Railroad, Recipes of a Railroad Housewife


4. From Rivets and Rails, Recipes from a Railroad Boarding House


5. The Cookery Journal of a Railroad Housewife


Thank you! We look forward to your feedback!


Tuesday, November 4, 2008

Happy foods

It's that time of the year, when we start thinking about food -- well, actually, we probably think about it all year, but this is the season when we might actually think more about what we'll be sharing with family and friends during the all the holidays and festivities that are to come.


I, for one, do that. But I also start zeroing in on eating "happy foods" -- foods that serve as little pick-me-ups for the brain, because for me, being the sun-lover that I am, living in a place in the winter that sees more darkness than daylight, and more fogginess than sunlight (when those temperature inversions set in), I try to keep my spirits boosted any which way I can.


After making my short list (see below), I was happy to see that at least one of my personal favorites was included on many of the happy food lists posted on the internet.


1. Salmon


2. Pomegranate. Yes, I settle for juice, because I haven't the patience to dig out out the fruit.


3. Avocado


No, chocolate isn't in my top three. It's not even in my top ten. And I have to admit it's beat out by another confection of the season. ... Something that I am supposed to learn how to make (this month!) per my New Year's Resolutions back in January. ... Fruitcake. But not just any fruitcake. My grandmother's fruitcake. Although looking at the recipe, I should probably rename it Datecake.


Dates, as it so happens, are included on those famous lists. They make you happy. Perhaps, I'd be willing to bet, they'll make you even happier when you eat them as cake. I like cake. Almost as much as I like pie--with apple being my favorite. ... But that's another story. For now, I'm focusing on cake.


Grandmother's Fruitcake, a.k.a., Datecake


1 pound Brazil Nuts
1 pound Walnuts
1 pound Dates, cut in pieces
1 1/2 cups white sugar
1 1/2 cups flour
1 tsp baking powder
1 tsp salt
2 medium size bottles marachino cherries and juice
4 beaten egg yolks
4 beaten egg whites


Put sugar over dates and nuts. Add egg yolks. Add dry ingredients and cherry juice. Add cherries. Fold in egg whites. Makes 2 loaves. Bake 1 1/2 - 2 hours in 325 - 350 degree oven.


You'll want to oil and flour the pans, too. I suspect, if you have a convection oven, or live in lower altitudes, go with the lower heat range.


Forgive the formatting. Blogger is NOT cooperating!